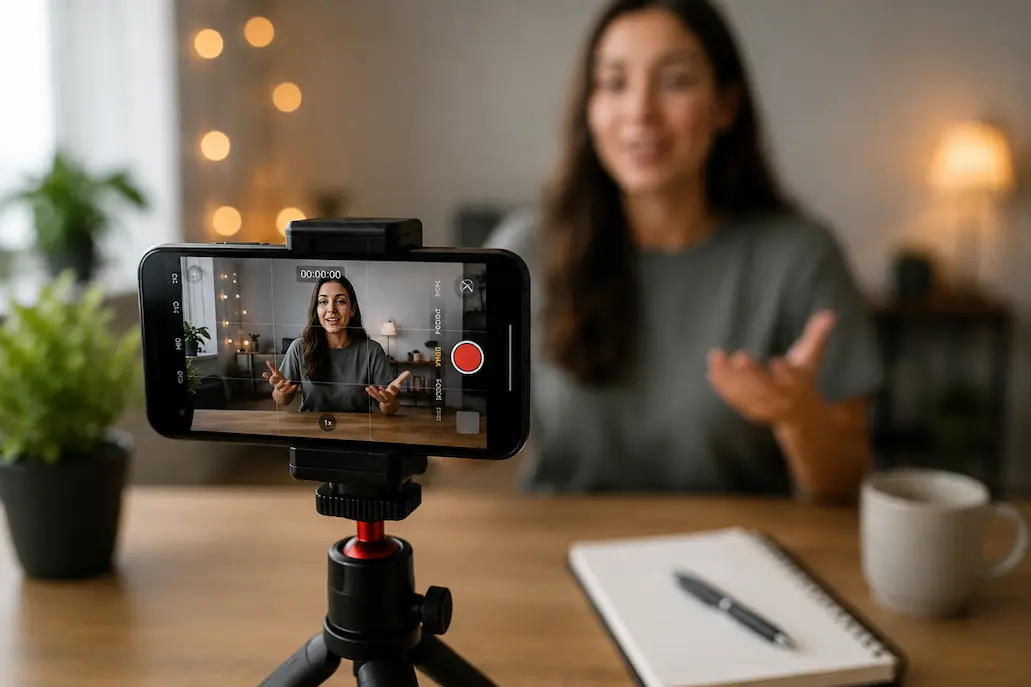
How to Turn Your Smartphone Into a Professional Video Camera
Your phone already shoots 4K video. It has optical picture stabilization, computational photography and processing capacity to edit feature films. Your camera in your pocket is technically better than the $50,000 broadcast cameras used for television news in 2010. And yet most smartphone footage still looks like… footage from a smartphone.
This gap is not hardware. It’s all the rest. Lighting that flatters, not flattens. Motion that energizes rather than distracts. Sound to match the picture quality. And configurations that uncover the real potential of the phone, instead of the usual compromises.
This article is a 48 hour challenge. Do this and your next video will look just as good as footage taken on dedicated cameras costing thousands. You have everything you need in your pocket and around your house.
Day 1, Hour 1: Fix Your Settings (10 Minutes)
Your phone’s default camera settings are optimized for convenience, not quality. Change these before you record anything:
iPhone Users
- Settings → Camera → Record Video → 4K at 24fps (24fps mimics film’s natural motion blur; 30fps and 60fps look “video-ish”)
- Settings → Camera → Record Video → HDR Video → OFF (HDR causes inconsistent exposure that complicates editing)
- Settings → Camera → Grid → ON (essential for composition)
- Settings → Camera → Formats → Most Compatible (avoids HEVC compatibility headaches)
Android Users (Samsung, Google Pixel, etc.)
- Camera app → Settings → Video resolution → UHD (3840×2160)
- Camera app → Settings → Frame rate → 24fps (if available; otherwise 30fps)
- Camera app → Settings → Video stabilization → ON
- Camera app → Settings → Grid lines → 3×3
These settings alone eliminate 50% of what makes smartphone footage look amateur. The 24fps change is particularly critical — it’s the difference between “home video” and “cinematic.”
Why 24fps Matters: Film cameras shot 24 frames per second for a century. Your brain associates this frame rate with “real cinema.” Higher frame rates look hyper-real, which reads as cheap or artificial. For narrative or promotional content, 24fps is non-negotiable.
Day 1, Hour 2: Master Natural Light (30 Minutes)
Light is more important than camera quality. A shot taken with a $50,000 film camera in low light looks worse than a photo taken with a mobile phone in good light. The good news is that natural light is free, abundant, and generally better than artificial light.
The Window Method
Stand in front of a large window. Do not stand too close to it, but look straight ahead. The window acts as a large, soft light source that illuminates your face evenly. This is the same principle that professional portrait photographers use with expensive softboxes.
Best time: Early morning (golden hour), or from 10:00 AM to early afternoon (soft, even light).
Avoid: Direct sunlight in the middle of the day, as this creates harsh shadows; backlighting (with the window behind you), as this creates silhouettes.
The Magic of the Golden Hour
The warm, concentrated sunlight of the hour before sunset and the hour after sunrise makes all subjects look exceptionally beautiful. If you have time to photograph, be sure to shoot during this period. You will immediately see a noticeable difference: skin tones glow more, backgrounds stand out better, and shadows are layered rather than distracting.
The Overcast Advantage
Filming on cloudy days is often underestimated. Clouds act as a giant natural diffuser, softening harsh shadows and creating even lighting. Some of the most impressive outdoor shots were actually taken during what photographers consider ‘bad’ weather.
Pro Tip: If you only have overhead indoor lighting, position a white bedsheet or poster board on the floor in front of you. It bounces light back up, filling in the shadows that overhead fixtures create under your eyes and chin.
Day 1, Hour 3: Stabilize Everything (20 Minutes)
Shaky footage is the fastest way to look amateur. Your phone has optical stabilization, but it’s designed for photos, not deliberate camera movement. Here’s how to eliminate shake without buying a gimbal:
The Tripod Substitute
Stack books on a table. Rest your phone against them. The stack should be tall enough that the camera is at eye level for interviews, or at the subject’s level for product shots. Use a rubber band to secure the phone if needed.
The Body Brace
For handheld shots, hold the phone with both hands, elbows tucked against your ribs, and breathe slowly. Your body becomes a human tripod. Take a step, plant your feet, then take another step. Never walk while recording unless you’re intentionally creating movement.
The String Tripod
Tie a 6-foot string to a 1/4-20 bolt (or just hold the string). Step on the other end. Pull up gently until the string is taut. The tension stabilizes vertical shake remarkably well. Total cost: under $2.
Day 1, Hour 4: Sound Like a Pro (45 Minutes)
Viewers forgive bad video. They don’t forgive bad audio. If your sound is poor, people assume your content is poor — even if the visuals are stunning. Here’s the smartphone sound fix:
The Lavalier Hack
Your phone’s built-in microphone picks up room echo, air conditioning, and every movement of your hand on the phone. The solution: use your phone’s wired earbuds with the built-in microphone. Clip the mic to your shirt collar, 6-8 inches from your mouth. The audio quality improves dramatically — not because the mic is great, but because it’s close.
The Second Phone Method
If you have access to a second phone (or an old phone in a drawer), use it as a dedicated audio recorder. Place it closer to your subject than the camera phone. Start recording on both devices simultaneously. In editing, replace the camera audio with the closer, cleaner audio from the second phone. Sync them by clapping once at the start — the visual clap creates a spike you can align in any editing app.
Environment Control
Before recording, listen. Really listen. Turn off fans, air conditioning, refrigerators (briefly), and anything that hums. Close windows facing traffic. Record in smaller rooms with soft furnishings — they absorb echo. The time you spend controlling sound before recording saves hours of frustration in editing.
| Audio Setup | Cost | Quality | Best For |
|---|---|---|---|
| Phone built-in mic | $0 | Poor (echo, handling noise) | Nothing — avoid this |
| Earbud mic clipped to collar | $0 | Good (proximity beats quality) | Talking head videos, interviews |
| Second phone as dedicated recorder | $0 | Very good (clean, close, separate) | Any content where audio matters |
Day 2, Hour 1: Compose Like a Cinematographer (30 Minutes)
Composition separates phone footage that looks accidental from footage that looks intentional. Three rules cover 90% of professional composition:
Rule of Thirds
Your phone’s grid divides the screen into nine boxes. Place your subject at the intersection of grid lines, not dead center. Centered subjects feel static and boring. Off-center subjects create visual tension and engagement.
For interviews, place the subject’s eyes on the top horizontal line. For landscapes, place the horizon on the lower or upper third, never the middle.
Headroom and Lead Room
Leave 10% of the frame above your subject’s head — no more, no less. Too much headroom makes them look small and insignificant. Too little feels claustrophobic.
If your subject is looking or moving in a direction, leave space in that direction (lead room). A subject looking right with no space on the right feels trapped. The frame should breathe in the direction of attention.
Background Separation
Amateur footage puts subjects against walls. Professional footage puts distance between subject and background. Even 3-4 feet of separation creates depth that makes your subject pop. The phone’s natural depth of field (blurry background) activates when there’s actual depth in the scene.
Day 2, Hour 2: Move With Purpose (20 Minutes)
Static shots are fine. But intentional movement adds energy. The key word is intentional — random movement looks like mistakes.
The Push-In
Slowly move the camera closer to your subject. This creates intimacy and emphasis. Use it when revealing something important or drawing attention to a detail. Move slowly — 10 seconds to cover 3 feet. Any faster feels rushed.
The Pan
Rotate the camera horizontally to reveal a scene. Start on one element, end on another. The pan should have a reason — “here’s the context, now here’s the subject.” Never pan just to show you can pan.
The Reveal
Use foreground objects (door frames, tree branches, furniture) to partially block the shot, then move past them to reveal the subject. This creates anticipation and visual interest. It’s a technique used constantly in professional filmmaking because it works.
Warning: Digital zoom destroys quality. Always move the phone closer instead of pinching to zoom. If you can’t get closer, record at 4K and crop in editing — you’ll still have 1080p quality, which is better than digital zoom’s pixelated mess.
Day 2, Hour 3: Edit Like a Pro (Free Software)
Raw footage is never final footage. Editing transforms good capture into great content. These free tools handle everything you need:
CapCut (Mobile)
Owned by ByteDance (TikTok’s parent company), CapCut is surprisingly powerful for a free mobile editor. Multi-track editing, color correction, speed ramps, transitions, and text overlays. The interface is intuitive enough to learn in an afternoon.
Best for: Social media content, quick-turn edits, vertical video
DaVinci Resolve (Desktop)
Hollywood-grade color grading, professional audio tools, and a full non-linear editor — completely free. The learning curve is steeper than CapCut, but the capabilities rival software costing thousands. If you’re serious about video, this is where you end up.
Best for: Long-form content, color-critical work, projects needing precise control
iMovie / Google Photos Editor
Built into your phone or computer. Limited features, but zero learning curve. Perfect for simple cuts, basic transitions, and adding music. Don’t underestimate the power of simplicity when you’re starting.
Best for: First projects, family videos, anything where “done” matters more than “perfect”
The 48-Hour Result Checklist
After following this challenge, your video should pass these tests:
- Frame rate is 24fps (cinematic, not video-ish)
- Lighting is even and flattering (no harsh shadows, no flat overhead)
- Camera is stable (no handheld shake unless intentional)
- Audio is clear and close (no echo, no background hum)
- Subject is composed with intention (rule of thirds, proper headroom)
- Movement serves the story (no random pans or zooms)
- Editing is clean (cuts happen on action or natural pauses)
Pass these seven checks, and your footage is professional. Not “good for a phone.” Professional, period.
When to Buy Gear (And What to Skip)
After 20+ videos using only your phone, you’ll know exactly what’s limiting you. Buy only to solve specific problems:
Buy a $30 tripod when you’re tired of stacking books and need consistent framing.
Buy a $50 LED panel when you regularly record at night or in windowless rooms.
Buy a $100 lavalier microphone when the earbud mic’s quality ceiling becomes audible.
Skip the gimbal until you genuinely need smooth tracking shots — most content doesn’t.
Skip the anamorphic lens until you understand why you want it — it’s a stylistic choice, not a quality upgrade.
Bottom Line: Your smartphone is already a professional video camera. The 48-hour challenge isn’t about adding capability — it’s about removing the defaults and habits that hide the capability you already have.
Related Articles
- Podcasting for Beginners: Free Audio Tools That Sound Professional
- Creative Block? These Digital Tools Break It in Under 10 Minutes
- How to Look Like a Pro Designer—Even If You’ve Never Opened Photoshop
- Ditch PowerPoint: Presentation Tools That Actually Impress Audiences
- How to Extract Text From Any Image Instantly—No Paid Software Needed
Sources and References
- Apple Inc. (2026). iPhone Camera User Guide: Video Settings and Best Practices. Apple Support. https://support.apple.com/iphone
- Blackmagic Design. (2026). DaVinci Resolve: Free Professional Video Editing. Blackmagic Design. https://www.blackmagicdesign.com/products/davinciresolve
- CapCut. (2026). Mobile Video Editing: Features and Workflows. CapCut Documentation. https://www.capcut.com
- American Society of Cinematographers. (2025). Composition Rules in Digital Cinematography: Rule of Thirds, Headroom, and Lead Room. ASC Magazine. https://ascmag.com
- Brown, B. (2024). Cinematic Smartphone Filmmaking: Techniques for 4K Mobile Video. No Film School. https://nofilmschool.com
About the Author: The InsightTrail team has shot professional video on phones, DSLRs, and cinema cameras. The best footage we ever captured was on a three-year-old iPhone in a hotel room with good window light. The gear doesn’t create the moment — you do.

Sunita Voss wanders through software like a city flâneur—observing, testing, occasionally getting lost, always finding shortcuts. She writes about digital minimalism, hidden web tools, and tech hacks with the patience of someone who enjoys the journey and the urgency of someone who values her time. No gurus. No gatekeeping. Just discovered paths.