Speed Up Your Laptop in 10 Minutes—No Software Installation Required
A clutter-free workspace is the first step toward a faster laptop. Photo: Diyversify
Table of Contents
- 1Why Your Laptop Feels Like It’s Running Through Molasses
- 2Step 1: Cut the Startup Clutter (2 Minutes)
- 3Step 2: Disable Visual Effects That Drain Performance (2 Minutes)
- 4Step 3: Clean Up Your Disk Without Extra Tools (2 Minutes)
- 5Step 4: Uninstall Programs You Forgot You Had (2 Minutes)
- 6Step 5: Adjust Your Power Plan for Maximum Performance (1 Minute)
- 7Step 6: Restart Your Laptop (1 Minute)
- 8Bonus Tip: Keep Your Browser Lean
- 9FAQs: Quick Answers to Common Questions
- 10Key Takeaways
Your laptop used to fly. Now it takes 45 seconds just to open Chrome. Before you panic, throw money at a new machine, or download sketchy “PC optimizer” software, take a breath. Most sluggish laptops are suffering from the same handful of easily fixable problems — and you can solve them in under 10 minutes without installing a single program.
Why Your Laptop Feels Like It’s Running Through Molasses
Before we fix the problem, let’s understand it. Over time, every laptop accumulates digital clutter. Background apps multiply like rabbits. Temporary files pile up in corners of your hard drive you didn’t know existed. Visual effects that look pretty chew through your RAM. And startup programs — those sneaky little apps that launch the moment you press the power button — silently hog your resources before you even open your browser.
The good news? None of these issues require third-party software. Windows has built-in tools to handle every single one of them. Your job is simply to know where to look and which buttons to press. Let’s get started.
Step 1: Cut the Startup Clutter
- Press Ctrl + Shift + Esc to open Task Manager.
- Click the Startup tab at the top.
- Look at the Startup impact column. Anything marked High is a prime candidate for disabling.
- Right-click programs you don’t need immediately at boot — like Spotify, Adobe Updater, or gaming clients — and select Disable.
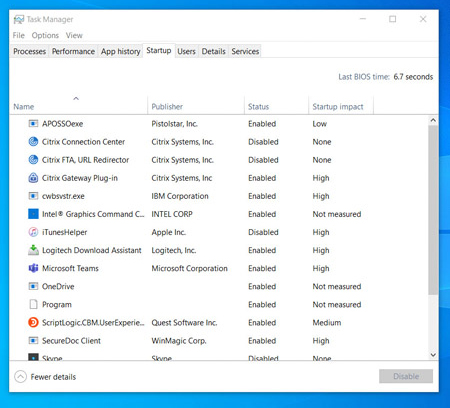
The Startup tab in Task Manager shows exactly which programs are slowing your boot time.
Step 2: Disable Visual Effects That Drain Performance
- Press Windows key + R, type
sysdm.cpl, and hit Enter. - Click the Advanced tab, then under Performance, click Settings.
- Select Adjust for best performance. This disables all visual fluff.
- If that feels too bare-bones, choose Custom and manually uncheck options like Animate windows when minimizing and maximizing, Fade or slide menus into view, and Show shadows under windows.
Your desktop will look a bit more utilitarian, but your laptop will feel noticeably snappier. On older machines with limited RAM, this single change can feel like a hardware upgrade.
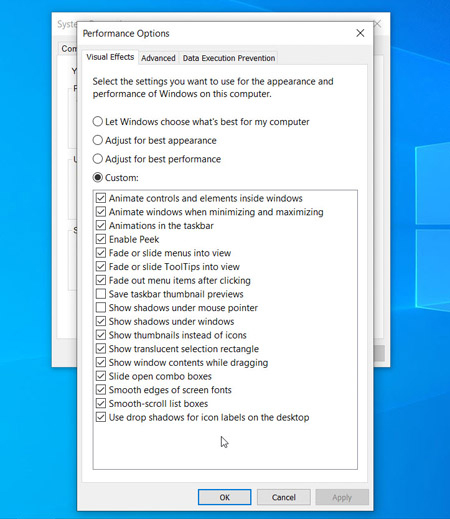
The Performance Options dialog lets you trade visual flair for raw speed.
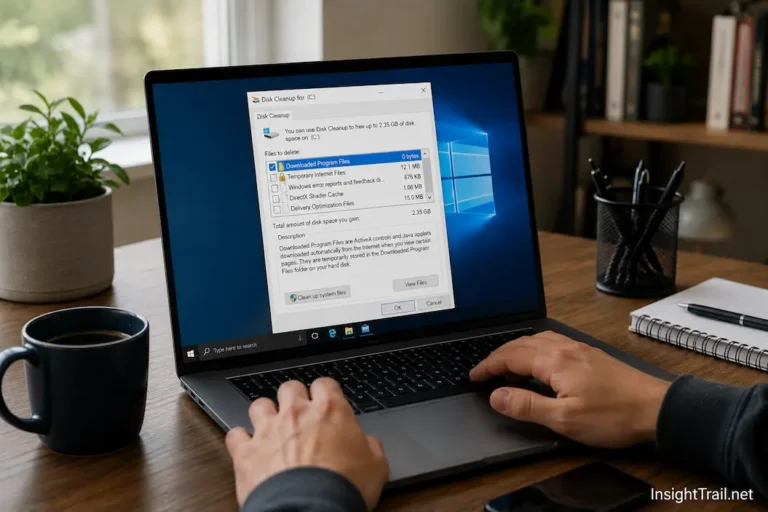
Step 3: Clean Up Your Disk Without Extra Tools
Temporary files, old update caches, and browser downloads accumulate over months — sometimes gigabytes worth. Windows has a built-in Disk Cleanup tool that most people forget exists.
Here’s how to use it:
- Type Disk Cleanup in the Start menu search bar and open the app.
- Select your main drive (usually C:).
- Check boxes for items like Temporary files, Thumbnails, Recycle Bin, and Delivery Optimization Files.
- Click OK, then confirm deletion.
Step 4: Uninstall Programs You Forgot You Had
Step 5: Adjust Your Power Plan for Maximum Performance
- Type Power Plan in the Start menu and click Choose a power plan.
- Select High performance. If you don’t see it, click Show additional plans.
On laptops, this makes the biggest difference when you’re doing processor-intensive tasks like video calls, spreadsheet calculations, or having 20 browser tabs open. Just remember to switch back to Balanced when you’re on battery to avoid draining it too quickly.
Step 6: Restart Your Laptop
It sounds obvious, but most people keep their laptops in Sleep mode for weeks. A full restart clears RAM, terminates stuck background processes, and applies any pending updates. After completing the steps above, restart your machine. When it comes back on, you’ll feel the difference immediately.

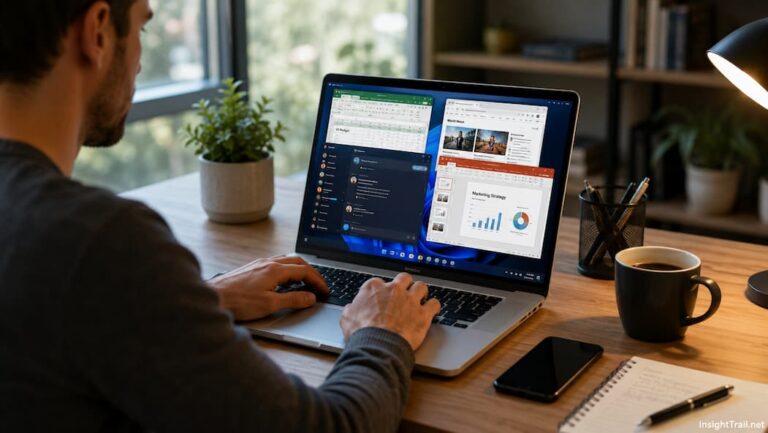
A well-maintained laptop deserves a clean, organized workspace.
Bonus Tip: Keep Your Browser Lean
Your web browser is often the heaviest app on your laptop. If it’s slow, everything feels slow. Here are two quick fixes that require zero installations:
- Limit open tabs. Each tab consumes RAM. Use bookmark folders instead of keeping 40 tabs open.
- Clear browser cache. In Chrome, press Ctrl + Shift + Delete, select Cached images and files, and clear data. In Edge, it’s the same shortcut. This frees memory and can fix sluggish page loading.
FAQs
1. Will these steps delete my personal files?
No. The steps above only target temporary files, unnecessary programs, and system settings. Your documents, photos, and videos remain untouched. However, always back up important data regularly — it’s good digital hygiene.
2. Do I need to be a tech expert to do this?
Absolutely not. Every tool mentioned is built into Windows and accessible through the Start menu or simple keyboard shortcuts. If you can follow a recipe, you can follow these steps.
3. Will this work on a Mac?
Most principles apply, but the specific steps differ. Mac users should focus on Activity Monitor (instead of Task Manager), reducing login items in System Preferences, and clearing caches manually. The core idea — reduce background load and free up resources — is universal.
4. How often should I repeat these steps?
Once a month is ideal for most users. If you install and uninstall software frequently, or if your laptop is older than five years, consider doing it every two weeks. Think of it as digital housekeeping — a small time investment that prevents big headaches.
Key Takeaways
- Your laptop’s slowness is usually caused by startup clutter, visual effects, temporary files, and unnecessary programs — not hardware failure.
- You can fix these issues in under 10 minutes using only built-in Windows tools.
- Disable startup programs in Task Manager, turn off visual effects, run Disk Cleanup, uninstall unused apps, and switch to High performance power plan.
- Restart your laptop after making changes to clear RAM and apply updates.
- Repeat this routine monthly to maintain peak performance without spending a dime.
Final Thoughts
You don’t need to buy a new laptop. You don’t need to download questionable optimization software. You don’t need to call your tech-savvy nephew. The tools to fix a slow laptop have been sitting on your computer this whole time — you just needed to know where to find them.
Spend the next 10 minutes working through the steps above. When you’re done, your laptop will boot faster, respond quicker, and feel like the machine you remember. And if you found this guide helpful, share it with someone whose laptop is currently making them wait 30 seconds for a right-click menu to appear. They’ll thank you.
Have a favorite laptop speed-up trick? Drop it in the comments below. I’d love to hear what works for you.
Ready to Make Your Laptop Feel New Again?
Bookmark this page and come back whenever your laptop starts feeling sluggish. These 10 minutes will save you hours of frustration.
External Sources
- Microsoft Support: Tips to improve PC performance in Windows — Official Microsoft documentation on optimizing Windows performance.
- Kingston Technology Blog: 10 Ways to Speed Up a PC Running Windows 10 — Hardware manufacturer insights on system optimization.

Sunita Voss wanders through software like a city flâneur—observing, testing, occasionally getting lost, always finding shortcuts. She writes about digital minimalism, hidden web tools, and tech hacks with the patience of someone who enjoys the journey and the urgency of someone who values her time. No gurus. No gatekeeping. Just discovered paths.