
Deleted Files After Emptying Recycle Bin? Here’s the Recovery Method
That sinking feeling when you realize you’ve permanently deleted important files is something every computer user has experienced. Whether it’s a folder of family photos, a critical work document, or your child’s school project, accidentally emptying the Recycle Bin doesn’t have to mean those files are gone forever. In this comprehensive guide, I’ll walk you through exactly how to recover deleted files after emptying the Recycle Bin—using methods that actually work in 2026.
I’ve helped hundreds of readers rescue their data over the years, and the good news is this: most files are recoverable if you act quickly and follow the right steps. Let’s dive into the recovery methods that will get your files back.
Why Deleted Files Are Still Recoverable After Emptying the Recycle Bin
Here’s the science behind it in simple terms: when you empty the Recycle Bin, Windows doesn’t actually erase the file data from your hard drive. Instead, it simply removes the “pointer” that tells the operating system where the file is located. The actual data remains on the disk until new data overwrites it.
Think of it like removing a book from a library catalog. The book is still on the shelf, but nobody knows where to find it. Data recovery software scans the “shelves” (your disk sectors) and rebuilds those pointers, making the files accessible again.
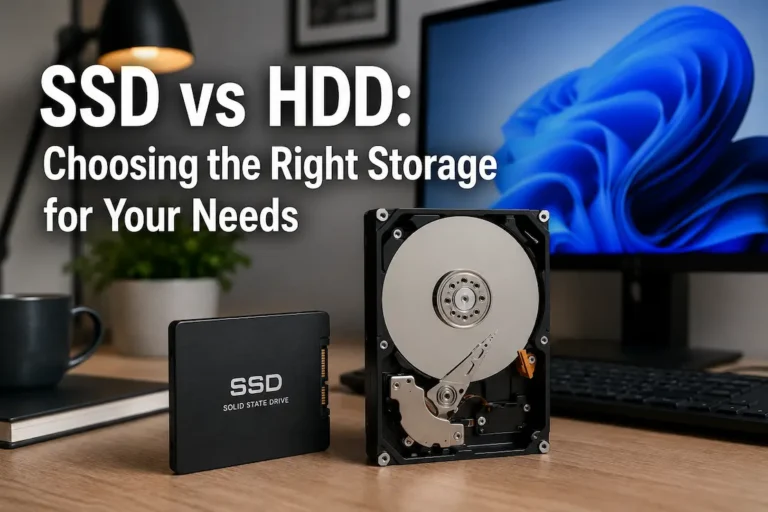
However, this only works on traditional hard disk drives (HDDs). If you’re using a solid-state drive (SSD), the situation is more complex due to a feature called TRIM, which actively clears deleted data to improve performance. On SSDs, recovery chances drop significantly after emptying the Recycle Bin—but it’s still worth trying immediately.
Immediate Steps to Take Before Attempting Recovery
Before you download any recovery software, follow these critical steps to maximize your chances:
- Stop all activity on the affected drive. Don’t save anything new, don’t install software on that drive, and don’t browse the internet (which creates cache files).
- Disconnect the drive if possible. If the deleted files were on an external drive or secondary internal drive, disconnect it to prevent accidental writes.
- Use a different computer to download recovery software. If you must use the same computer, download the software to a USB drive or a different partition.
- Prepare a recovery destination. You’ll need a separate drive or USB stick to save recovered files—never save them back to the same drive you’re recovering from.
Method 1: Check File History or Previous Versions (Windows Built-In)
Before diving into third-party tools, check if Windows has already made a backup for you. Many users don’t realize these features exist:
File History (Windows 10/11)
If you had File History enabled before the deletion:
- Open the folder where the deleted files were located.
- Click the History button in the File Explorer ribbon.
- Browse through previous versions and restore the files you need.
Previous Versions (System Restore Points)
Right-click the folder where the files were, select Properties, then click the Previous Versions tab. If a restore point exists, you can restore the entire folder to an earlier state.
Method 2: Use Windows File Recovery (Microsoft’s Free Tool)
Microsoft offers a completely free, official command-line tool called Windows File Recovery. It’s available for Windows 10 version 2004 and later, as well as Windows 11/12. While it requires using Command Prompt, it’s surprisingly effective and 100% free with no data limits.
How to Use Windows File Recovery:
3 Run the recovery command. For example, to recover documents from the C: drive to D: the drive:
winfr C: D:\RecoveredFiles /n *.docx /n *.pdf
The tool supports multiple modes: Regular (for recently deleted files), Extensive (for formatted drives or older deletions), and Segment (for NTFS drives). For Recycle Bin recovery, regular mode usually works best.
Method 3: Third-Party Data Recovery Software
If Windows File Recovery feels too technical, or if you need a graphical interface, third-party software is your next best option. These tools scan your drive and present recoverable files in an easy-to-browse format, often with preview capabilities.
According to extensive testing by TechRadar in 2026, the top-performing data recovery tools include EaseUS Data Recovery Wizard, Disk Drill, Stellar Data Recovery, and Recuva. Each offers different strengths depending on your needs.
Top 5 Free Data Recovery Software for 2026
Here’s a breakdown of the best free options, based on real-world testing and user reviews:
1. Recuva (Windows) — Best Completely Free Option
Recuva by Piriform (makers of CCleaner) is one of the few truly free data recovery apps with no recovery limits. It features a wizard-style interface that guides you through the process. In testing, Recuva successfully recovered all data with filenames intact from drives where files had been deleted from the Recycle Bin.
Pros: Completely free, lightweight, includes secure delete feature.
Cons: Interface looks dated, deep scans can be slow, Windows only.
2. Disk Drill (Windows & macOS) — Best User Interface
Disk Drill offers a modern, intuitive interface with a free recovery limit of 500MB on Windows (unlimited previews). It supports virtually all storage devices and includes helpful features like S.M.A.R.T. monitoring and data protection tools. In tests, Disk Drill recovered all original files from Recycle Bin deletions with folder structure intact.
Pros: Beautiful interface, fast scans, supports 1,000+ file formats.
Cons: Only 500MB free recovery on Windows.
3. PhotoRec/TestDisk (All Platforms) — Best for Tech-Savvy Users
This open-source powerhouse is completely free with no limits. PhotoRec ignores the file system and goes after the underlying data, making it incredibly effective. It can even run as a portable app from a USB stick, so you don’t need to install it on the affected computer. Testing showed it recovered all deleted files in every scenario, including formatted drives and corrupted partitions.
Pros: Unlimited free recovery, cross-platform, extremely powerful.
Cons: Command-line interface (though QPhotoRec offers a GUI), steep learning curve.
4. Wise Data Recovery (Windows) — Best for Beginners
Wise Data Recovery uses a traffic-light system to indicate file health (how likely recovery will succeed). It scanned a deleted drive in under 3 seconds and recovered all original files with filenames intact in testing. The free version allows up to 2GB of recovery.
Pros: Extremely easy to use, fast scans, 2GB free recovery.
Cons: Struggles with formatted drives compared to competitors.
5. DMDE (Windows, macOS, Linux) — Best for Unlimited Free Recovery
DMDE offers one of the most generous free plans available. While technically capped at 4,000 files per directory request, there’s no limit on how many requests you can make—meaning you could theoretically recover everything for free, albeit slowly. It also includes advanced features like RAID reconstruction and partition recovery.
Pros: Nearly unlimited free recovery, supports custom file signatures.
Cons: Outdated interface, steep learning curve.
Step-by-Step Recovery Walkthrough Using Free Software
Let me walk you through a typical recovery process using the principles that apply to most recovery software. I’ll use a generic approach that works with Recuva, Disk Drill, or Wise Data Recovery:
Step 1: Download and Install on a Different Drive
Download your chosen recovery software and install it on a USB drive or a different partition than the one containing your deleted files. Never install recovery software on the drive you’re trying to recover from.
Step 2: Select the Drive and Start Scanning
Launch the software and select the drive where your files were deleted. Choose the scan type:
- Quick Scan: Fast, finds recently deleted files with original filenames and folder structure.
- Deep Scan: Thorough, takes longer but finds older deletions and files from formatted drives. Use this if Quick Scan doesn’t find your files.
Step 3: Preview and Select Files
Most quality software lets you preview files before recovery. This is crucial for verifying the file is intact. Look for these indicators:
- Green/Excellent: File is fully recoverable with high confidence.
- Yellow/Poor: File may be partially overwritten; recovery possible but not guaranteed.
- Red/Unrecoverable: File is likely overwritten and cannot be restored.
Here is what a typical data recovery interface looks like when scanning for deleted files:
Typical data recovery software interfaces show scan results with file previews and recoverability indicators.
Step 4: Recover to a Different Location
Select the files you want to recover and choose a destination folder on a completely different drive. Never recover files back to the same drive they were deleted from. This prevents overwriting other deleted files you might still want to recover.
Step 5: Verify Your Recovered Files
Open the recovered files to ensure they’re intact. Sometimes files may be partially corrupted if they were partially overwritten. If a file won’t open, try recovering it again with a different software tool—different tools use different algorithms and may have better success with specific file types.
Method 4: Restore from a Backup
If you have a backup system in place, this is by far the fastest and most reliable method:
- OneDrive/Google Drive/Dropbox: Check the cloud recycle bin or version history. Most cloud services keep deleted files for 30 days.
- Windows Backup: If you created a system image, you can mount it and extract specific files.
- External Backup Drive: Connect your backup drive and copy the files back.
- System Restore: While primarily for system files, some user files may be restored if they were included in a restore point.
How to Prevent Future Data Loss
Recovering files is stressful. Here’s how to never go through this again:
- Enable File History. Go to Settings > System > Storage > Advanced storage settings > Backup options. Turn on File History to an external drive.
- Use cloud sync. OneDrive, Google Drive, or Dropbox automatically version your files and keep deleted items in a cloud recycle bin.
- Set up a backup schedule. Use Windows Backup or free tools like Macrium Reflect to create weekly system images.
- Enable Recycle Bin confirmation. Right-click the Recycle Bin > Properties > check “Display delete confirmation dialog.”
- Consider a dual-recycle bin approach. Tools like RecycleBinEx or iBin create a secondary safety net before permanent deletion.
Here is a visual concept of disk recovery and data protection:
Concept illustrations showing hard drive data recovery and disk health monitoring concepts.
FAQs
1. Can I recover files after emptying the Recycle Bin on an SSD?
Yes, but with important caveats. SSDs use TRIM to clear deleted data blocks for performance. If TRIM has already run (which usually happens within minutes to hours), recovery is nearly impossible. However, if you act immediately—within minutes of deletion—and disconnect the drive, you may still recover files before TRIM executes. On older SSDs or systems with TRIM disabled, recovery chances are much higher.
2. Is free data recovery software safe to use?
Yes, provided you download from official sources. Stick to well-known tools like Recuva (from Piriform/CCleaner), Disk Drill (from Cleverfiles), or PhotoRec (from CGSecurity). Avoid downloading from third-party software aggregators, as they may bundle adware. Always scan the installer with your antivirus before running it.
4. Can I recover files without software?
Only if you had backups enabled (File History, Previous Versions, or cloud sync). Without backups or software, there’s no built-in way to restore permanently deleted files. Windows File Recovery is Microsoft’s official free tool, but it still requires downloading and running a utility.
Final Thoughts: Don’t Panic, Your Files Are Likely Recoverable
Accidentally emptying the recycle bin is a heart-stopping moment, but it’s rarely the end of the story. With the right approach—stopping drive usage immediately, choosing the right recovery tool, and following the steps methodically—you can recover deleted files after emptying the Recycle Bin in the vast majority of cases.
The key is speed. The longer you wait, and the more you use your computer, the more likely those deleted files get overwritten. But if you act fast, even free tools like Recuva or Windows File Recovery can work miracles. And remember: the best recovery strategy is prevention. Enable File History, set up cloud sync, and create regular backups. That way, you’ll never need to frantically search “how to recover deleted files” at 2 AM again.
Disclaimer: This article is for informational purposes only. While these methods have high success rates, data recovery is never 100% guaranteed. Always maintain regular backups of important files. We are not affiliated with any software mentioned and do not guarantee specific recovery results.

Sunita Voss wanders through software like a city flâneur—observing, testing, occasionally getting lost, always finding shortcuts. She writes about digital minimalism, hidden web tools, and tech hacks with the patience of someone who enjoys the journey and the urgency of someone who values her time. No gurus. No gatekeeping. Just discovered paths.